|
|
|
Sanding
Understand what your finish
system requires. You have to approach sanding from the perspective of
the finish and not your finger. Of course you sand to level joints and
smooth the surface; however you are also providing a uniform texture
that will help take stains evenly and provide a tooth for the finish to
grab on to. Selecting the correct grit and type of paper are crucial.
Many of the high solids finishes require less white wood sanding than
their older counterparts. Over-sanding is not only counterproductive,
but it will ultimately encourage adhesion problems. MDF requires a
different sanding schedule and mineral type than wood.
Wood should be sanded just
prior to staining and finishing. Pieces sanded the day before could be
subject to adhesion problems. If you can not sand and finish the same
day, give a quick scuff to the surface the day you finish. Be sure to
let coats of finish dry sufficiently before sanding, but don’t wait too
long. The process of spraying a coat of finish, sanding it and then
applying the next coat should optimally take place within a 24 hour
period. The goal is to apply the next coat before the previous coat of
finish is totally shrunk; this way the new coat is deposited in the
sanding scratches of the first coat which will then shrink around the
new material and give you maximum inter-coat adhesion. This is very
important when using any type of catalyzed finish since they do not melt
into the previous coat. |
|
 |
|
SANDING - HARDWOOD LUMBER AND VENEER
-
Sand unfinished
wood with an open coat aluminum oxide paper, silicone carbide is too
sharp.
-
Sand lumber with
a grit no higher than a 150.
-
You can sand
veneers one grit higher than lumber; but no higher than a 180 grit.
-
Use a progression
of grits. Skipping a grit may cause uneven staining or even scratches to
telegraph thru your topcoats.
-
Break edges. The
finish film shrinks as it dries. Sharp edges will rip the film and allow
water and oil to eventually get in. Think of it as stretching a piece of
Plastic Wrap over a knife blade.
-
The day that you
sand your wood is the day that you should stain and seal it. Simple
things like changes in the humidity level can cause the wood to swell
and you will lose the tooth you were trying to create.
|
|
|
|
SANDING - MDF
-
MDF faces should be sanded with a 320 silicone
carbide paper. Silicone Carbide paper works the best since it is
very sharp and the face of MDF is very hard, almost
tempered.
-
MDF edges and
profiles should be sanded with only 400 and 600 grit silicone carbide
sandpaper. A course paper tends to pull out the wood fibers from the
binder in the MDF, resulting in more pits in the surface. Use a course
paper only when it is necessary to remove chatter from a cutter.
|
|
 |
|
SANDING - BETWEEN COATS OF FINISH
Just as we sand to create
scratches in the wood to give the surface a “tooth” for your stains and
finishes to grab on to, we also need to create a texture, or scratch,
between coats of finish so that the next layer has something to grip.
Remember that only the old nitrocellulose lacquers melt into the
previous coat of finish. All catalyzed finishes bond to the previous
layer by a mechanical link; they need a rough surface. You should sand
between coats of finish with 220 to 320 paper .A silicone carbide or a
high quality stearated aluminum oxide paper, like the Mirka Royal, is
recommended. |
|
 |
|
sanding guidelines
-
Your sander or
hand block should have a soft pad. A hard pad may sand faster, but a
soft pad will compensate for minor irregularities in the wood and will
allow a more consistent contact of the grit with the surface it is
sanding.
-
If you sand by
hand, you should duplicate your style and movements consistently from
piece to piece, edge to edge.
-
If you spot sand
by hand use at least one grit finer than the last grit you used on the
machine.
-
The particles on
your sandpaper wear down or break off as they are used. A worn out 120
grit belt will polish a board smoother than a 400 grit belt. By
replacing sandpaper or belts before they get too worn you will maintain
a more consistent scratch pattern and depth.
-
Pieces should be
recoated within 8 hours of being sanded.
-
To sand between
coats of finish use a stearated silicone carbide paper or a high quality
aluminum oxide paper, like Mirka Royal for sanding finishes.
-
Waterborne
finishes will often develop fisheyes if sanded with a zinc stearated
paper. Some manufacturers use a calcium stearated which will not cause fisheyes..
-
Woven pads, like
Mirka’s Mirlon and 3M’s ScotchBrite are good for scuffing toner and
washcoats. They scuff the surface, but won’t level it.
-
Avoid using Steel
Wool as it may contain oil and the fibers are hard to clean up.
-
Avoid burn thru’s
between coats. Give a burn thru extra drying time before recoating. This
will reduce the chance of wrinkling the next coat of finish.
-
If you are going
to glaze, remember that the glaze will stick in your sanding scratches
so sand carefully.
-
Always remove
sanding dust before recoating. Take extra care to get it out of the
pores of woods like oak.
|
|
|
|
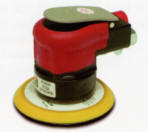
SWIRL MARKS
-
A word about swirl marks. If
you have them, then there is a problem with your sander, your system or
the person using it. An adequately powered, properly maintained sander,
using the correct progression of grits will not swirl. Notice the
keywords: adequately powered, properly maintained and correct
progression of grits. A few simple precautions and you can all but
eliminate them from your life.
-
If you are using
pneumatic sanders, check your plumbing. Be aware that the length and
size of piping and hose will affect performance. A common culprit is the
use of reducers to go in and out of improperly sized filters or
regulators.
-
Use Hi-Flow
connectors to increase your CFM delivery to your machine by almost 100%.
-
Check your
equipment. Inspect, Clean, Lubricate, Repair, Replace. Nothing lasts
forever.
-
Check pads and
bearings. Flat pads and smooth bearings; it’s a good thing.
-
Check your
technique. Let the tool do the work. If you slow it down, it will swirl.
Excess pressure on a sander will change a random orbital pattern into an
orbital pattern.
-
Check your
sanding schedule. Don’t make big jumps between grits. Skip steps and it
will swirl.
-
Check your paper.
Keep it sharp.
-
Micron graded
paper will swirl less than CAMI or P graded papers.
-
Check the
moisture content of your wood. If it’s wet, it will swirl.
- Use your
instincts. If it doesn’t look, feel or sound right, it will swirl.
|
|
|
|
|