|
Setup on an AAA sprayer is a little different than an air
atomized gun. The AAA atomizes mostly by hydraulic pressure. It
uses a little compressed air to atomize the tail ends of the
fan. Since there is not a lot of compressed air behind the
finish as it leaves the gun it travels at a lower velocity than
with an air atomized gun - this results in more finish sticking
to the target and less bouncing off as overspray.
The tips are rated by fan size and flow per minute. Many guns
have a fan adjustment control on them, however, when adjusting
the fan some become more circular shaped as they get smaller.
You will find that you will have different tips with one flow
rate to accommodate your various finishes and viscosities. You
might want to get each of the different flow rated tips in both
a wide and narrow fan pattern. Check with your pump manufacturer
for recommendations.
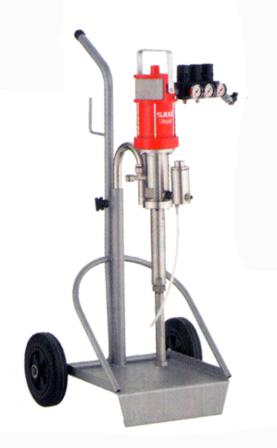
Pumps are rated as a ratio of input air to fluid compression. A
10:1 pump will put out 10 pounds of hydraulic pressure for every
1 pound of air put into the pump. A 14:1 pump will put out 14
pounds of hydraulic pressure for every 1 pound of air put into
the pump and so on. When setting up the pump, you will want to
use the lowest atomizing pressure that will properly atomize
your finish. Too much atomizing pressure will increase the
velocity of the finish as it leaves the gun and will decrease
the transfer efficiency as the finish is more prone to bounce
off of the target. High pump pressures can sometimes cause
bubbles to form in lower viscosity materials. Most AAA pumps
atomize well at about 400 PSI. That is 40 PSI air pressure on a
10:1 pump, and about 30 PSI on a 14:1 pump. If you find that you
have to raise the pump pressure significantly above these
pressures you should consider going to the next size larger tip
and reducing the pump pressure.
WORDS
OF CAUTION: Read your Owners Manual and follow all
precautions. A pump that is putting out 400+ PSI at the tip will
have little problem blowing finish through your skin and into
you. This is bound to ruin your day and you should seek medical
attention immediately. AAA guns have trigger locks. Lock the
trigger at all times except when you are actually spraying. Many
pumps have an on/off valve right where you connect to your air
supply. Turn the valve off or disconnect the air source whenever
you are servicing or not actively using the pump. Even with the
air supply disconnected and the regulator off, the material hose
is charged with pressure. This is like having a bullet in the
chamber after you remove the clip. Aim the gun into an
appropriate container and pull the trigger to discharge the
line pressure. Because of the potential for built up static
electricity, always ground the pump and use the static
dissipating air hose between the gun and the pump.
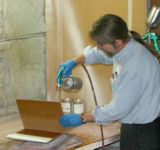
To
begin the setup, have your material ready with the viscosity
checked and any necessary reducer or retarder added. Most pumps
require very little reduction. You will find that you add
solvent to compensate for temperature and aid in flow-out. You
do not have to “thin” to aid atomization. Place the pumps
material pick-up tube into the liquid and prime the pump. Start
by having both the pump pressure and atomizing air pressure set
to zero. Remove the air cap/tip. Aim the gun into a clean
container or back into the material pail, release the trigger
lock and pull the trigger. Slowly turn up the pump pressure
until the pump cycles very slowly, 2-5 PSI of air is usually all
that is necessary. Soon the material will flow out of the gun.
If the pump is cycling and no material flows, check for a clog
in the feed tube.
There is also a check valve ball in the bottom of the pressure
cylinder where the feed tube connects. If it is not completely
clean it may stick in the closed position. Use a small diameter
wooden stick to push the ball up to free it. Re-engage the
trigger lock. Replace the air cap/tip. Make sure that the
surface of the nozzle, where the tip touches it, is clean and
that the air cap is tightened sufficiently. If material comes
out of the horns of the air cap you need to check the two
preceding items.
Turn the pump pressure up until you have about 400 PSI at the
tip, not at the gauge. Remember the pressure ratio of the pump.
Release the trigger lock, and spray a pass across a piece of
paper or cardboard. Adjust the pump pressure up or down slightly
depending on how fast you are used to moving your hand across
the target. Avoid going below 400 PSI or you may experience
material build up on the tip. You will notice that the fan has
“tails” on the end. Turn up your atomizing air pressure until
the tails disappear. Avoid using more atomizing air than
necessary or you will increase overspray and decrease transfer
efficiency. You are ready to spray.
If you are experiencing material build up on the tip, try
increasing the pump pressure or dropping down one tip size. A
small adjustment in reduction may also help.
|